Monday, December 10, 2012

Canvas and Bamboo

The Canvas Print
People love these things.  They were first used by artists to recreate their paintings and such.  Now available everywhere.  I have struggled to find reasonable prices and good quality for these things.  I refuse to charge $20 for an 8x 10 print and $300 for the same in canvas.  

Finally, I have found a professional lab that I love.   They are 1.5" deep stretched onto wood frames and coated for UV light protection. 


and so, the real reason you are looking at this.  The price list:

   11x14    $100  +  $20 S&H
14x14     $125 + $20 S&H
12x18     $125 + $20 S&H
16x20    $160 + $35 S&H
20x20   $185 +$ 35 S&H
20x30   $195 + $35 S&H


And, introducing the less popular but possibly much nicer bamboo prints.  
I think these things are amazing.


  These bamboo blocks are handmade in the USA and even eco friendly.

 Sizes 5x7 and larger arrive with a handy keyhole in the back to hang up.  

You can chose between 1 1/2 inch or 3/4 inch thickness.

These bamboo beauties come in many different sizes - so you can hang them on your wall or just stack one on your desk.

They come in many different sizes.


2.5x3.5-   $45  +  $10 S&H
4x4      -   $50  +  $10 S&H
4x6      -   $55  +  $10 S&H
5x5      -   $60  +  $10 S&H
5x7      -   $65  +  $10 S&H
8x8      -   $70  +  $20 S&H
8x10    -   $75  +  $20 S&H
8x12    -   $80  +  $20 S&H
11x14  -   $120 + $20 S&H
12x12  -   $125 + $20 S&H
12x18  -   $180 + $20 S&H
16x20  -   $250 + $30 S&H


Saturday, November 10, 2012

Canvas Prints


Canvas prints are overpriced. 

No ifs, ands, or buts about it. 

Here is an amazing deal,

$29 for a 16x20 print.  

I am just about to order one for myself. 

Only 5 more days for this deal:
http://www.livingsocial.com/cities/996-bend-or/deals/513876-personalized-canvas-print

Kelby and Matt


There is something sort of amazing about taking photos of close friends.  This girl and I went to kindergarten together.  We both coincidently ended up moving schools and towns for high school. We were sent to the same summer camp.  I love her.  Kelby and I didn't stay in touch very well after we graduated, but every time I see her it's like time hasn't passed.   This is just a couple from a mini shoot I did with her and her fiance Matt.  Sometimes the weather doesn't cooperate.  Although it looks like a crisp fall day - it was rainy and pretty miserable.  So we rescheduled - but not after I got a few good shots. 


  And Kelby looks like a runway model - it is almost impossible to find a bad angle on her.

     Tomorrow, we get to continue to the shoot and do a few 'save the date' photos.   The second shoot is always much easier.  The couple knows what to expect, how to be comfortable, and I have figured out the best lighting for them.  Luckily their wedding isn't until July so, just incase the weather decides not to cooperate.....

Friday, October 12, 2012

Photos and Clothes

I have a living social deal coming out in a couple of weeks which means I am going to seriously need to streamline my photo sessions.  One thing I absolutely need to do is write up a guide for my clients about what to wear.

And here it is, the family edition.

1. Choose several outfits.  Bring them with you.

  • Something casual and neutralish.  Wear something that you normally do. Jeans and a T-shirt? Perfect.  Stay away from anything with words or images on it.  Especially on children's clothing.  I promise, in 15 years you will love the picture much more if it doesn't have Thomas the Tank Engine or a sassy phrase.  Stay away from bright bright colors.  I'm not saying everyone should wear matching khakis and white polos, and actually, DONT do that- but baby blue looks much better in photos than hot pink. Promise. 
  • Something dressy.  Again, that doesn't mean 6 inch stiletto heals.  A nice timeless dress. A button down shirt.  The look to go for is classic.  I would again recommend muted colors but more on that later.   
  •  Something fun and trendy.   In twenty years those turquoise skinny jeans might look like those floral shoulder padded dresses.  However, I think that a few pictures should be fun or trendy.  Go ahead, bust out that front mini skirt that is floor length in the back.  Hats with animal faces on them. Cowboy hats. Something hot pink and sassy.  Here is the time to bust out the neon. 
2. Colors
  • Some photographers will tell you to wear bright colors.  I will not.  I want to capture your story, your family, and your personalities - not your clothes.  Colors that compliment your family and not overwhelm them.  I would avoid hot pinks, reds, too much white, and anything in neon.  All black can also get funky and unflattering. 
3. Cut and flatter
  • Think timeless.  What looks good in a mirror will not necessarily look good in a photo.  You want your clothes to be fitted.  An oversized shirt or dress will make you look frumpy.  Dresses and shirts that are waisted generally photograph nicely.  Nothing too tight.  If you are sucking in your breath the entire time the photos will turn out awkward.  Always.  
4. COMFORT
  • If you are uncomfortable with what you are wearing it will show!

So, this is my standard.  I think I'm going to have to change the wording around to make it a little bit more professional.  

Saturday, September 15, 2012

Hibernation

Since I have returned from Ecuador I have been obsessed with 'saving food for winter.'   Like a squirrel.  Or a pioneer women.  Or someone who does not live a 10 minute walk from two grocery stores with awesome health food sections.  But I'm obsessed.  I want a huge freezer so I can make a lifetime of food.  For the zombie apocalypse. When all the power would go out and my freezer full of soups would rot.  Anyways, I have canned, I have pickled, I have sauced.  Now I am freezing.

Tonight, during my first day of of new job, I got the brilliant idea to stock my refrigerator full of frozen soups for the winter.  And then I read about putting soup in freezer bag, setting it in a square container and freezing it.  Then you take the bag of soup out and it's in a square.  My mind was blown.  Really friends, BLOWN.  Now I have a list of 10 soups to try.   Tonights was potato broccoli.  It was delicious.  Seriously.  I added a tiny bit of soy creamer towards the end for a more creamy end.  I also added some garlic powder.  

I'm obsessed.  

I got the recipe here.  Next time I think I will try and add a couple leaves of kale and spinach to up the nutrition.  

I ran the recipe through a calculator for the whole recipe- this is easily 2.5 servings.  It's a little high in fat/carbs/sodium.  Also, I'm not sure what sort of vegetable broth they are using in this calculation but there was not 2351 mg of sodium.  Never. I think some kale and maybe some low sodium vegetable broth.
Nutrition Facts
Serving Size 984 g
Amount Per Serving
Calories 
328
Calories from Fat 
170
% Daily Value*
Total Fat 
18.9g
29%
Saturated Fat 
3.3g
16%
Cholesterol 
0mg
0%
Sodium 
2351mg
98%
Total Carbohydrates 
22.1g
7%
Dietary Fiber 
5.9g
24%
Sugars 
8.1g
Protein 
20.5g
Vitamin A 22%Vitamin C 272%
Calcium 14%Iron 18%
Nutrition Grade A-
* Based on a 2000 calorie diet

Thursday, September 6, 2012

Senior Portraits

I've been meaning to update this ol' bloggy for a while.   But, the whole no one reading and fear of sounding ridiculous thing has made me hesitant.

BUT

I have some pretty senior portraits to post.

Melissa was my 'model' for senior portraits so I could build up my portfolio and use her in advertising.  As far as things found off of craigslist, she was a wonderful surprise.  She was cute, photogenic, and knew how to pose.   We did two shoots, one in downtown Bend and the other in this ridiculous field of flowers.  I actually had to bring down the colors on the flowers because they were TOO VIBRANT.

Anyways, some photos to post.


Melissa is planning as using this photo as her yearbook photo!


This one and the one below it are my favorites.  LOOK AT THOSE FLOWERS!


 Which is your favorite?

Hannah


Friday, August 17, 2012

The Covers

Jesiah and I are moving into a new "town house" and I have been busy trying to move in and create a nice space for us.  I have this half memory of making these outlet covers when I was a kid with my mother.  They are incredibly easy,  cheap, and look pretty.

I found a pack of scrap-booking paper from Micheals for $10.  The packs are nice because they have multiple variations on the same design and color.  You do, however, have to sift through all the terrible terrible scrapbook paper out there.   You can also use fabric or wrapping paper.

You also need some Mod Podge.  I used the matte finish for this project but glossy or any of the other hundreds they sell.  There are even some with glitter.   An X-acto blade, some sort of cutting surface, and a large marker are also handy tools.  I just bought cheap covers from Home Depot for about 25 cents each.

I didn't take pictures of this next part. But, basically, you cut the paper out so it is about 1/2 an inch bigger than the cover on all sides.   Using a foam brush (or a paint brush, just make sure it's okay quality so the bristles don't get caught in the podge) podge the front side of the cover and center it on the paper.  The back side of the paper.   Use a marker to smooth it so you don't get any air bubbles or wrinkles.

Carefully podge the edges of the paper and fold them in, pressing against the paper until it sets.  You might need to trim the paper down or cut small triangles from the corners.  Fold down the edges on all four sides.   Don't be afraid to get crazy with the podge here.  I like to coat over the edges 4 or 5 times.

Using the x-acto knife, cut an X shape in the "hole" part of the light switches or a 6 pointed star in the outlet covers.  Carefully fold over and glue down making sure the edges are tight.   If there is excess paper the covers wont fit properly.

Podge the back side.  Turn it over and brush podge all over the front side.  I set on a towel to dry in my living room, and then later went back and re-podged them.  The podge makes them less papery and more plasticy.   I imagine you could wipe these guys down with a damp towel with no problem.

Dry overnight and... voila you have outlet covers!   Don't worry about holes for the screws, just carefully screw them into the wall.
I chose turquoise and teals for the livingroom/kitchen/dining room as they are all pretty much one giant room.
The two bathrooms have weird purple/pink butterfly wallpaper.  I hate them.  So I decided to do rainbow because I wasn't sure what else would match with this ugly space.  I wasn't about to find pink butterfly paper.  
For the hallway and staircase I did these.  Simply because I liked the paper. 
For the office/guest room I did these nice green colors.   
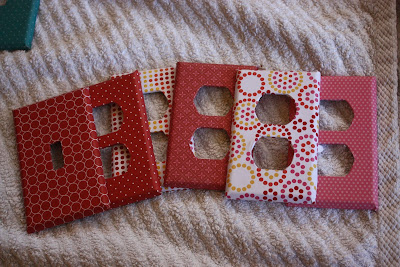
And for the bedroom I chose reds.

 This apt has a crazy amount of outlets.  Over 20.  Six in the bedroom.

I can't wait to put them in the wall... after my landlord comes by tomorrow.

Friday, August 3, 2012

Wedding Bells

Today I am headed out to go and take some "getting ready" pictures for an old friend from highschool.   We didn't stay in touch after I left for college but I am excited that I get to be at her wedding (as a guest! wahoo!) and take some 'before' pictures.

Katie spent every night at my house during high school.  And by that I mean that she told her parents she was at mine but never actually stayed over.  When I first met her mom she was incredibly happy to meet the girl who her daughter had been 'living with'.  

Katie and I feel out of touch for the last 6 years or so.  I am so happy that I not only got to reconnect with her, but that I got to attend her beautiful wedding!


CONGRATS KEEBLE!

Maternity Photos

This week I got the opportunity to 'practice' taking maternity photos for a friend-of-a-friend.   Maternity photos are something that I had never done and was dreading having to do.   I feel like so often they are cheesy or just plain weird.  Rarely do I see any that I like.  Something about being pregnant just seems to bring out the strange photography fantasies in people...   

You know, like tiger people...
   or creepy naked ones.

Luckily, Bernadette was not only sane, she was extremely photogenic.   I really enjoyed our morning together.  She is only 22 years old and an incredible mom to one and expecting another.  Her family raises adorable red rabbits and easily have the strangest cutest cat ever.  But more than anything, she was a dream client.  Every pose was perfect and she had an uncanny ability to look 'candid'.   I can't wait to photograph her newborn son in the fall- even if he is only half as photogenic as his mother. 

Here are my favorites:


oh, and her cat!


On a business note, today I ordered business cards.  Wahoo!  I am well on my way to actually charging for my services. 


Monday, July 23, 2012

The Beginning

I am awkwardly writing this first post.  I guess it has to happen.  The inevitable first introduction that no one is reading.  hopefully.

Anyways,
Me in a nutshell:

I own a photography company.  By own I mostly mean starting.  Owning is easy.  I studied photography at University of Oregon and my passion is working in the darkroom with large format negatives.  Now, I am without darkroom.

I craft. A lot.  This includes cooking.   Tonight I made 60 jars of jam.  Yes, sixty.   Jamming is a particularly crafty sort of cooking, don't you agree?  I forced my boyfriend to pick 19 pounds of raspberries and 14.5 pounds of blueberries yesterday.  He was not pleased.

I live in a barn.  Yes a barn.  It's 3 stories and red.  I live there with my boyfriend. We are in the market for a stove so we can start eating hot food.   Our tiny refrigerator is full of film.  We live there with two barn cats.  They hide behind vintage suitcases and hiss.   I have started collecting silver buckets to decorate with because they look so at home there.  My life is particularly glamorous at the moment.

I just got back from living in rural Ecuador for 1.5 years.  I taught English in the small town of Guaranda.  Now I am happily unemployed and making jam.  Oh, and that photography company I 'own'.   I am trying to live out all the dreams I had in ecuador of cooking,  gardening, exercising, and enjoying Oregon.